Tuesday 21 February 2017

AHPC - 'West' Bonus round entries

Hi Folks,

Lots of blogging this week!

On Saturday night (and into the early hours of Sunday) I was feverishly working to try and finish off an entry into the Analogue Hobbies Painting Challenge bonus round for Sunday. This bonus round theme was 'west', so having thought a bit about how West connects to what I'm working on, I established a few big connections.

Firstly, my FoW stuff is for the western front. Secondly, the trucks I have been working on are of Canadian manufacture - which led me to consider Canada's contribution to the war effort. Thirdly, Canada was one of Britain's most important allies - a western (geographically and politically) ally no less! The Canadian connection also works on another level for my collection, as my Highlanders were under the command of 2nd Canadian Corps during Operation Totalize.

Given all of this, I quickly established that I would use these trucks as my entry!

This set of vehicles, along with the other 5 I am working on, have taken a bit of time to get to this point. Prep wise, there is very little stowage on them, mainly because of the nature of the trucks. However, I did want to follow the idea I had many many moons ago - the trucks should be made into little dioramas. This would mean:

- Bases had to be trimmed from those trucks with a cast on base (6 of the 8). These then needed to be added on to a FoW Medium base to allow room for figures to be added

- Figures suitable for dioramas had to be sourced. This was something I had been working on for a long time, which has now come to fruition.

- I would need to do 8 dioramas, which was a challenge in of itself.

- The dioramas had to be logical, follow a 'theme' for Normandy and work with each other (to a certain degree).

The concept for the 128th Field Regiments trucks was that they here being harassed by some unseen sniper. Something that was common in artillery positions which were moving forward to keep up with an advance.

So, with a sniper lurking in a hedgerow somewhere nearby, what would be happening in the battery position?


For the first base, I went for a typical event that occurs in every Allied account of Normandy I have ever read. Troops 'foraging' to supplement their tinned rations. As such, I have to likely characters, returning from a 'fruitful quick wander' round the nearby area. One of them clutching a cask of Calvados and the other with a chicken - which was "Awready deed when we fun'it Sur!"

Finding themselves on the receiving end of a snipers attention (maybe it was his chicken?), they have taken cover behind a truck.


These figures are from the Battlefront 'Commonwealth Infantry' pack, with head swaps using the 'Guards' heads that were available separately.  The lighting in these pics isn't great, but it does look like the facial details need some work, as does the chicken! It is possible the light has just bleached them out a bit - they were actually both of squared paper when the pics were taken!

Next up, a survey team. This consists of an officer with a piece of survey equipment (my take on a 'No. 7 Director'), and a Private with a survey pole. The sniper has interrupted the work of laying the guns on the 'zero line', and the officer is looking rather impatient... Somewhere 'up front' an infantry unit might be looking for fire support.


Both figures are older Flames of War infantry figures. The chap with the pole was actually a pioneer with a Bangalore torpedo!

Lastly, we have a 'patrol' of either local (infantry) Jocks who have been roped in to help, or some of the battery troops (they look a little too well equipped to be the latter). These guys are being sent out to deal with the sniper. I think the chap on the corner looks suitably happy about his role.


Some shots of the three:


All three of them together. Imagine the sniper is somewhere 'above' the top edge of the picture.


So that's it! I've another 5 of these to do, which I should finish this week in time for my Thursday submission deadline. If you like what you've seen here, can I please ask that you check out my entry here (and check out the other entries as well!). I'd appreciate it if you could take the time to vote on my 'Canadian Jock artillery vehicles'! My entry in the challenge also talks a little more about Canada's significant manufacturing contribution to the allied victory.

Sunday 19 February 2017

Something you don't see every day! (15mm Ram II tank)

Hi folks,

As part of my Totalise Project there are things I come across that are historically accurate but missing from model ranges (or decal ranges). One of those things were Canadian Ram II tanks.

These were created by the Canadians and shipped over to the UK in large numbers. However, it was viewed as obsolete by 1944 so was used mainly for training. From Wiki:

"A prototype Ram was completed in June 1941, and general production of the Ram I began in November of the same year. The Ram I and early Ram IIs were fitted with side doors in the hull and an auxiliary machine gun turret in the front. The former weakened the hull and complicated production, and the doors and the machine gun turret were discarded in later modifications. By February 1942, production had switched to the Ram II model with a 6-pounder gun and continued until July 1943. In March 1942 a decision had been made to change production over to the automotively-similar M4A1 Sherman tank for all British and Canadian units. Ram production continued due to delay in starting the new M4 production lines and a reluctance to let the plant lie idle.[3] By July 1943 1,948 vehicles, plus 84 artillery observation post (OP) vehicles, had been completed.

The official Canadian history of the war compares the Ram to the Ross rifle as examples of unsuccessful Canadian weapon designs. It states that given the Sherman's superiority, in retrospect it would probably have been better for the United States to produce more tanks, and for Canada to have focused on manufacturing more transport vehicles such as the successful Canadian Military Pattern truck designs. The Sexton self-propelled gun based on the Ram chassis, however, was very successful.

As built, the Ram was never used in combat as a tank, but was used for crew training in Great Britain up to mid 1944. The observation post vehicles and Armoured Personnel Carrier, gun tractor, and munitions carrier versions of the Ram saw considerable active service in North West Europe. These tanks were mainly rebuilt by Canadian Army workshops in the United Kingdom. Conversions of Ram tanks with the Wasp II flamethrower gear were used by the 5th Canadian Armoured Brigade in the Netherlands in 1945."

It is the artillery OP and Artillery Tow version which interested me. I've had an interest in getting some of these for my planned Canadian forces for a while. Last year, prior to embarking on this 'all nations' Totalise Project, I had bought 3 packs of Ram Kangeroos, in order to do a later war version of my Highlanders. However, the planned use of these vehicles had changed with the change in focus onto Totalise, with 4 of them being used as 17 Pounder Tows for my Canadians, and 2 of them getting turrets to act as OP tanks.

Ram OP tank in Normandy - the full version of this picture shows 2 Canadian 4th Armoured Division Shermans behind, 

But as I had the hulls, where could I get the turrets?

I searched about, and found someone who had scratch built turrets. They looked great, but I didn't think I could replicate what they had done - and didn't want to spend a lot of time working on something I would end up unhappy with. I checked Shapeways, where the full tank is available to buy at 1/100ths scale, but for £25 each. A lot of month to spend on 2 tanks! No one, it seems, made turrets for this tank.

Eventually, months later, I approached Butlers Printed Models with a query about them designing and building a turret for me. Peter was very very helpful, and for a small fee - well, smaller than the cost of two tanks off Shapeways - Peter agreed to do the design work, send me a prototype and get some turrets done!

Less than two weeks later:

Ram II Turret in 15mm, for use in Flames of War

The Butlers Printed Models turret on the Battlefront Kangeroo hull.

Now it is 3D printed, so there is a little roughness to the turret, but not a huge amount compared to other 3D printed then cast models I have worked with in the past. Very little clean up was required. The turret fits perfectly on the Battlefront Kangeroo hull, although some of the turret ring details have to be removed (mainly the mounting for the .50cal). I think with a coat of paint on these guys they will be a fantastic addition to my army. Peter also modelled the Early, Late and Close Support versions of the turret - mines is the Late version.

The best bit is that the model I 'commissioned' is available for purchase on the Butlers Printed Model webstore - here!

Hopefully, I've have these painted 'soon'!

AHPC 3rd Entry - Gunuary still lives!

Hi folks,

This week I've been chipping away at my remaining Gunuary projects, with two elements coming to fruition in a short time. As I type, I'm waiting for a coat of varnish to dry in order to try and get an entry in for tomorrows 'themed' round entry.

For Thursday, I managed to finish off the command, staff and OP teams I required as part of the Gunuary goal of filling out all the missing teams in my various artillery units. As such, I finished off different teams for a few different units:

2 Pulk Artylerii Motorwej, 1st Polish Armoured Brigade:

1 x Staff team
2 x Command teams
1 x Jeep

79th Medium Regiment (The Scottish Horse), 4 AGRA - I'm missing decals for this unit at the moment, so the AOS markings on the vehicles are not correct currently, and there is no formation badge):

1 x Staff team
3 x Command teams
2 x OP teams
1 x Jeep
2 x OP Universal Carriers

128th Field Regiment, 51st Highland Division:

1 x Jeep
1 x OP Universal Carrier

I've grouped the units by type for the pics, rather than by unit. One thing I really need to do is get some sort of unit marking system for my bases, so I know which teams go with which units. Not such a big deal at the moment, but with my attempts to paint unit patches onto the soldiers arms, it will become relevant.

Staff teams (the one with the motorbike is for the 79th Medium Regiment):


OP teams:


Command teams:


Jeeps:


UC OP Carriers:


So this little lot bagged be 96 points. I'm pretty happy with them, barring the fact some of the faces are rubbish and some of the sculpted faces are poor (a couple of miscasts). Decals need to be fixed for the Medium Regiment vehicles and some of the aerial holes on models needs a little work to close them up a bit (the drill bit was slightly too large). I've also got some of the detail on the back of the jeeps to fix! Funny the things you notice looking at the pics!

Anyway, I'll check if the varnish is dry on the next lot, and plow on!

Tuesday 14 February 2017

Black Powder Battle Report - The 3rd Battle of El Teb

Hi Folks,

I had the pleasure this weekend of attending a Sunday Gaming day with 'The Old Guard Wargames Club' just outside Northallerton. We had a day of gaming (with a short visit to the pub for lunch), and much of the day was spent playing a 28mm game of Black Powder using Dave D's impressive collection of Sudanese figures.

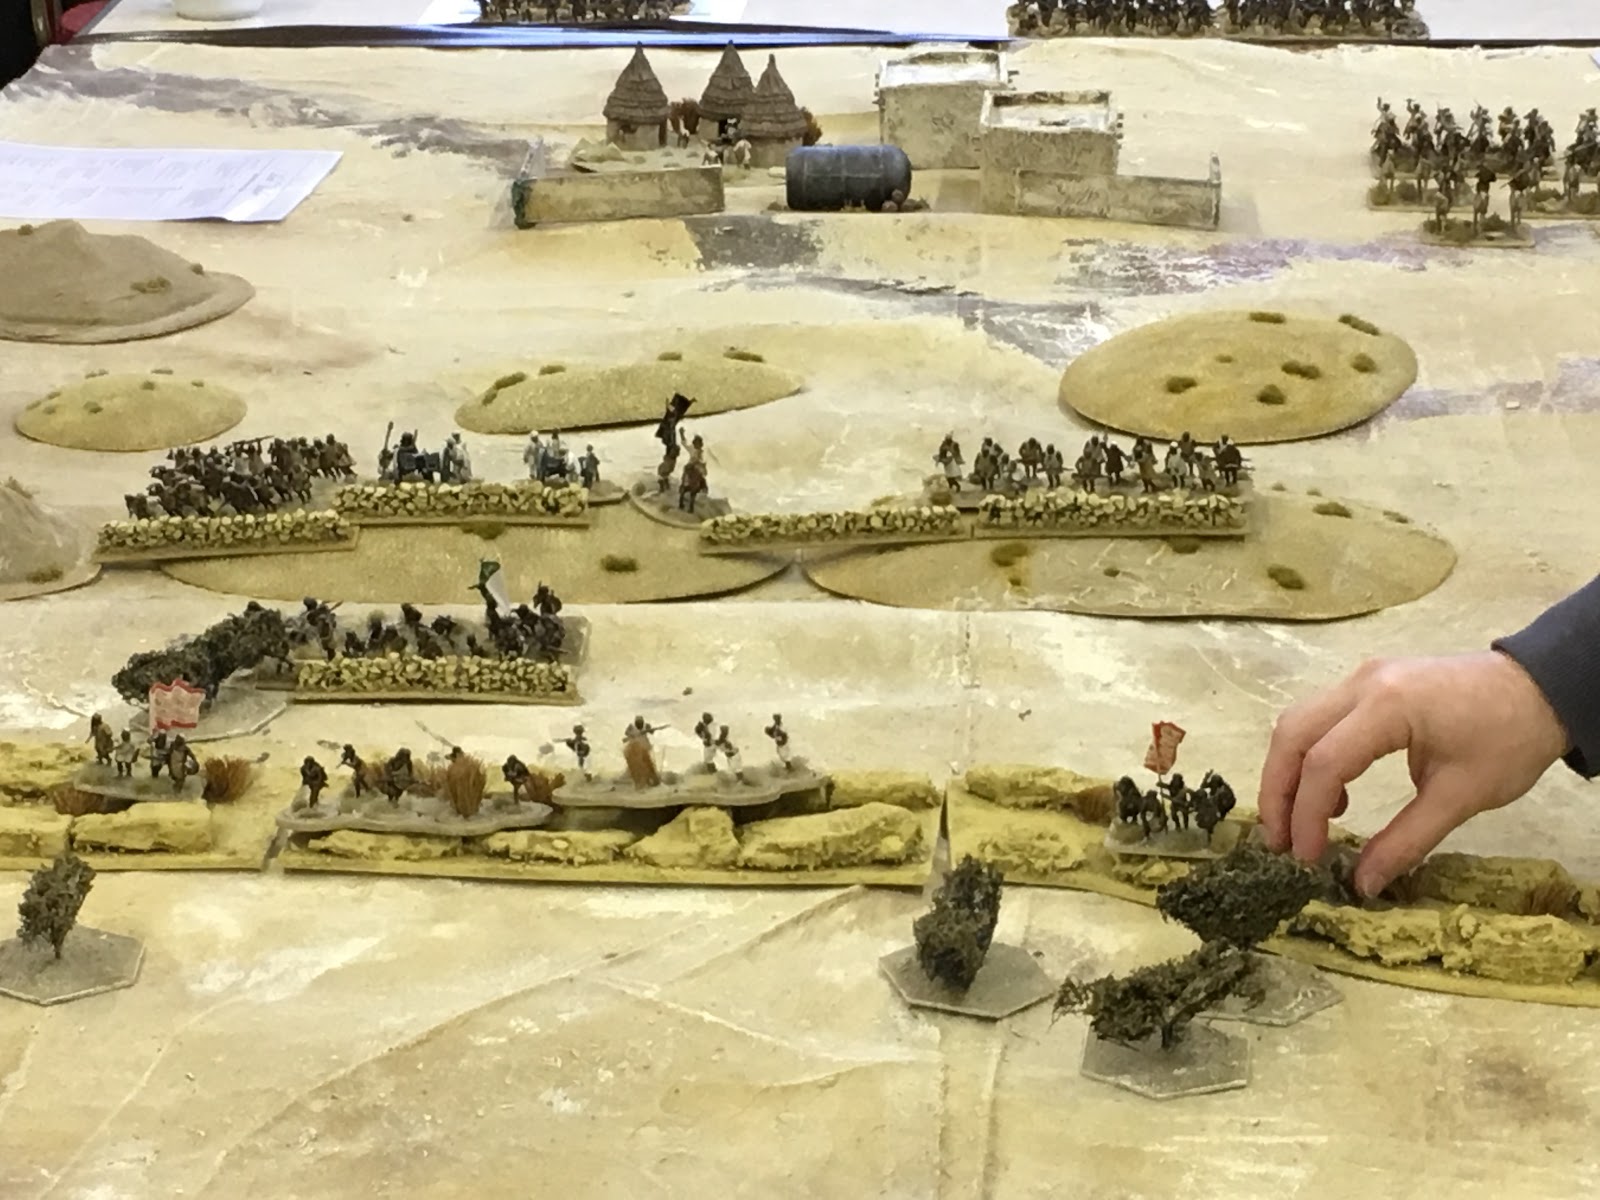
We were playing on a 12' by 6' table, and the scenario was from the Black Powder rule book. Notice the village at the very very very far away end of the table.

Other reporters have gotten their 'stories to the papers' first. Check out Dave's report here, and Martin's here. Excuse the tongue in cheek report!


I had volunteered in advance to command the British 2nd Brigade. This comprised of:

- A Battalion of the Black Watch
- A Battalion of Royal Marines Light Infantry
- A Battalion of the Yorkshire and Lancaster Regiment
- A detachment of sailors with two 'machine guns' (and a small skirmish base once deployed)
- A Royal Artillery Howitzer

I was fighting alongside Martin, with his 1st Brigade:

- A Battalion of the Kings Royal Rifle Corps
- A Battalion of The Gordon Highlanders
- A Battalion of the Royal Irish Fusiliers
- A Royal Artillery Howitzer

And John with his Cavalry Brigade:

- 10th Hussars
- 19th Hussars
- Mounted Infantry
- Abyssinian Mounted Scouts

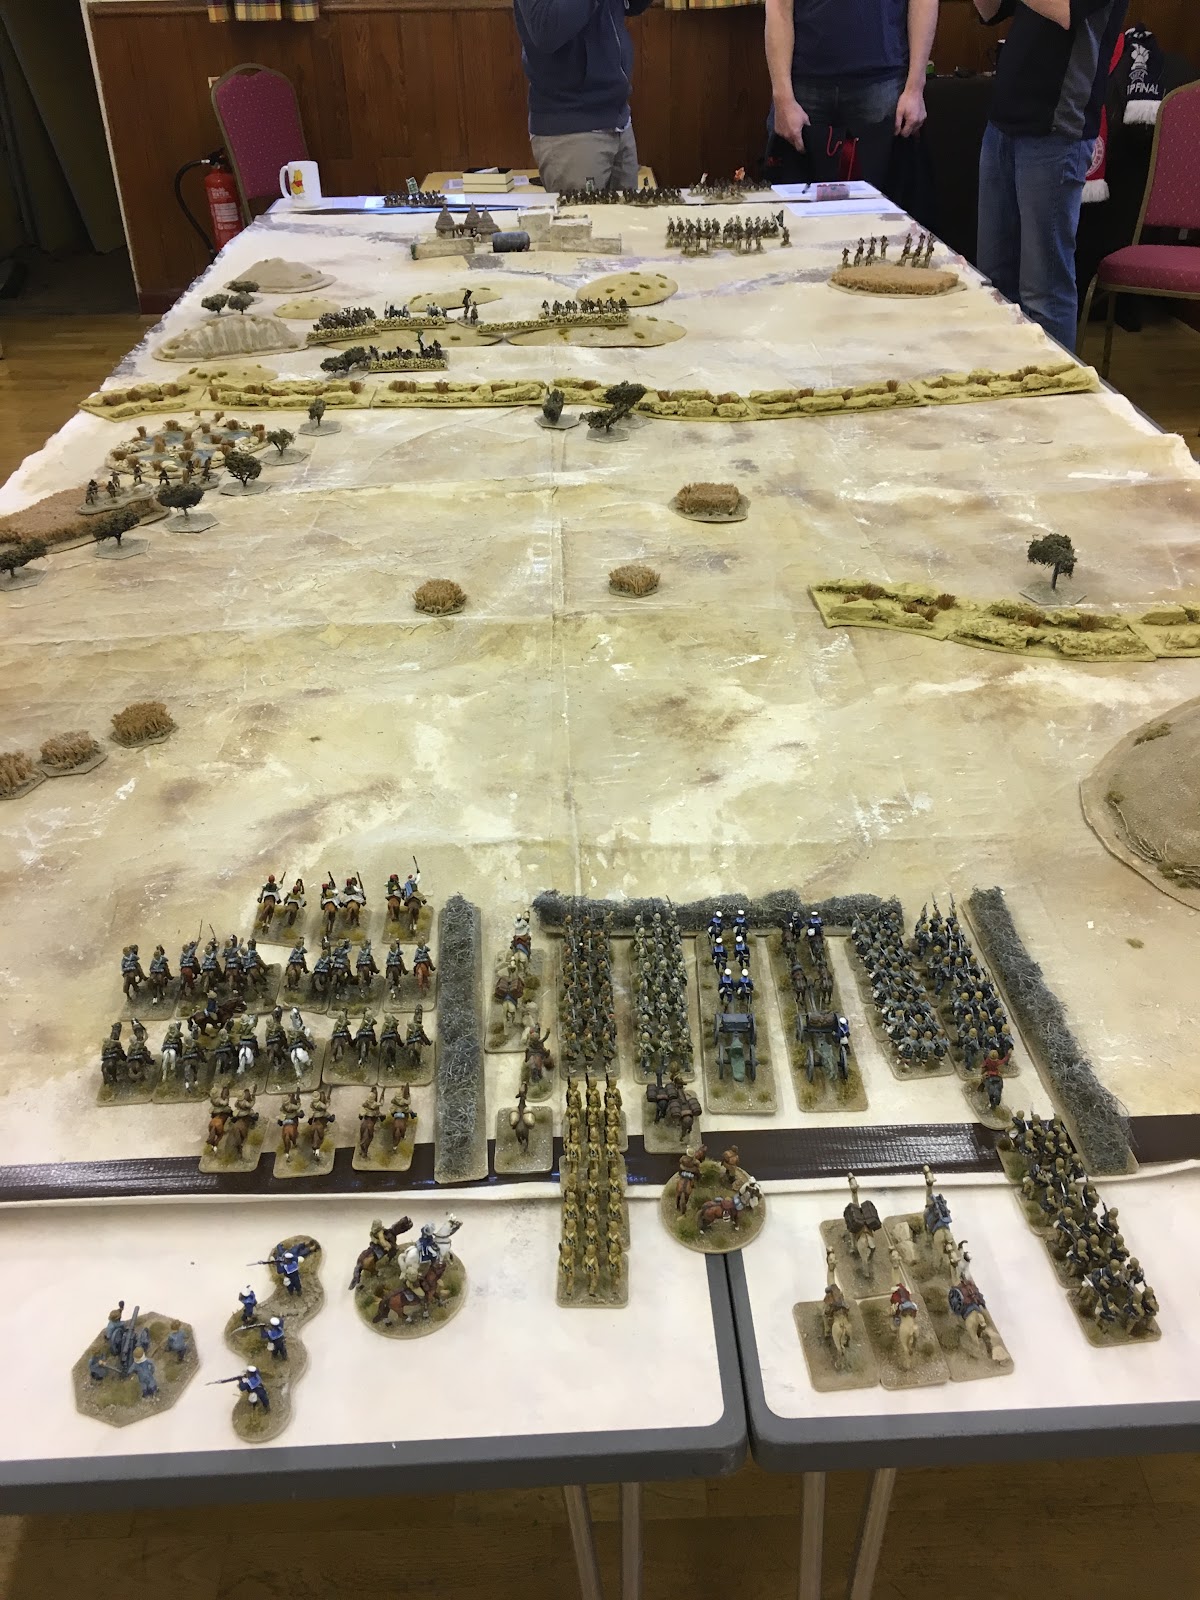
Some pics of the arrayed force:


And my own forces....

My Brigade - front left is the artillery gun on the back of the camel (limbered), on the right of that the Black Watch with the RMLI to their right and the two naval 'machine guns'. Behind them the Y&L's and some correspondents.


Our mission was to capture the village ahead within 8 turns. This seemed like a tough order, given the size of the table (and this was reinforced by the first few turns being less than stellar). Our 'emergency' path to victory was discussed before the game and quickly became 'Plan B' (AKA 'lets just smash the F*ck out of their army and win that way').

The Mahdist forces were split in two, with one large 'brigade' of 10 or so infantry units and two guns, while the cavalry 'brigade' consisted of two horse cavalry units and two camel skirmish units. These were deployed after ours, with a lot of the units in 'reserve' off table. 

Our forces had a limited deployment area as we were arriving in column. We squeezed as much in as we could. The plan was for my brigade to go up the centre, martins on my right with 3 Battalions and a gun to advance up my right (clearing the terrain there as he went) and the Cavalry under John to scout terrain and cover my left.

We immediately realised that the Mahdist forces would likely try to hold the ridge line and the wadi to our front, but knowing the enemy to be sneaky beggars, we were expecting ambushes from other terrain. We were also planning to get our artillery forward to a position to be able to hit the ridge line.

So, with the bold Black Watch leading the way, the attack stepped off.


Initial movement was slow, with several units failing command checks. We didn't know at this point that units in column get to move once without any checks.I moved forward quickly, while Martin on my right deployed troops to check out the wadi there. The Cavalry advances to keep pace except for the mounted infantry, who were to hang back - they were a small unit and losing both small units could cost us the brigade. However, they kept failing command checks and I think it was turn 3 or 4 before they moved!

Mahdist troops appeared on the expected ridge line, with two cannon and several infantry units. Skirmished appeared in the wadi to the front and left. Mahdist artillery at long range proved very (too?) adept and put a hit on the Black Watch causing them to fall into a state of disorder (I think the rum ration may have been hit...). The skirmishers on the left also hit the leading cavalry unit and put them into disorder. This is where things started to go wrong...


2nd turn, the Rifle Brigade troops on the right decided to blunder, and rather than clearing the wadi they moved sideways - into my columns. This caused further disruption to the advance, and meant the right hand brigade was only advancing on the Generals command check (Roy was the supreme commander).


The RMLI deployed into line to advance on the skirmishers ahead, and the machine guns moved up and unlimbered with the skirmishers covering the flank (towards the wadi). 1st brigade did move forward to support. The cavalry stopped to water the horses, it was time for Gin, or something...


Fire was opened on the skirmishers ahead, with the machine guns being pretty underwhelming!

On the 3rd turn, the Black Watch got shifting and moved out to the left to tackle the skirmishers there. 1st Brigade moved up on the right and deployed into line beside the RMLI. Our guns began to hit back at the Mahdist artillery, deploying into firing positions. The cavalry were now having tea with little cakes...


While the Ethiopian scouts were forward with the leading troops and actually engaging the enemy with small arms!


But little did we know what was coming!


Fire from our units at the fore destroyed the Mhadist unit in the forest while the Black Watch disordered the skirmishers on my left with close range fire.

 
However, Mahdist turn 3 saw the rest of their army turn up - mainly in the rough ground ahead of the Black Watch. Time to fix bayonets lads! Lots of fanatic spear armed units suddenly appeared in the undergrowth...


Thankfully, none could charge straight away due to distance and terrain. But there was now a veritable horde in front of the lone Black Watch battalion.

On the right flank (a sideshow compared to the main battle...!) a mass of Mahdist cavalry advanced, lead by skirmishers on camels.

Thankfully in the British turn 4, the British cavalry finished their tea party and decided to help out the Black Watch. A solid cavalry charge by the 19th Hussars destroyed one enemy unit, while the Black Watch fired on those to their front and disordered them (unable to move or charge next turn).

White rings on units represent casualties and red rings disorder.


The other units in my brigade hurriedly shifted to the left to support the Black Watch, while the Machine Guns lost one gun to artillery fire.  The 1st Brigade (Martins) on the right put fire into the camel skirmishers to their front, putting both units into disorder and (we decided) effectively blocked a charge route for the mass of cavalry behind. This was to be a recurring theme, with a traffic jam developing on that flank.


With a little more help on the left, I felt a little more secure - and Plan B (Kill them all!) was now in force, so it was useful that the Mahdists had come to us! Johns Cavalry charged another Mahdist unit and both groups took a beating, with the cavalry winning the fight but deciding to fall back having become shaken.


The combat which resulted in the British Hussars winning, but returning to their own lines to regroup!
In the Mahdist turn 4, yet more troops arrive! Those across the wadi surprised us by leaving their positions to charge forward into the centre and developing fight on the left flank, while the fight on the right hots up. My sailors with their Machine Guns moved up to support the 1st Brigade line, but the gun jammed...

The Royal Marines moving up to support the Black Watch but receive a charge from Mahdist units across the wadi, which they manage to beat off against the odds - becoming shaken from casualties in the process.

Turn 5 saw poor command rolls from me, and not much movement. The cavalry held the line, with the plan to charge any incoming charge and allowing the Black Watch to concentrate on firing at the units to their front.

The Mahdist turn 5 saw more charges hit the British line. The under pressure Royal Marines, the Black Watch, the Sailors with their jammed Machine Gun and the Y&L's all take a charge, with the Y&L's being charged in the flank. This ended badly, with the unit being forced to retire in disorder. The RMLI drew their combat but found themselves surrounded. Things were looking bleak. The Black Watch gave the incoming charge a volley and I think it failed to connect. The Machine Gun managed to draw the combat - unwilling to give up the gun! The Mahdist cavalry moved around the stalled skirmishers and charged the Gordons - suffering a volley in the way in and then ranks of Scots with bayonets fixed! The Cavalry broke and fled.


But the poor RMLI...


In the British turn, the ongoing combats with the Royal Marines and the Machine Gun ended in disaster. The Royal Marines fell to the blades of the Mahdists, as did the gun crew. One unit of the  skirmishing camels on the right flank finally had enough of the sustained volleys of rifle fire and fled, reducing the 'brigade' to half strength.


On the other flank, the Black Watch put in a charge which destroyed one Mahdist unit and wheeled onto the flank of the two others (already threatened by the cavalry). Behind them the guns and Y&L put fire into the Mahdist units that smashed the RMLI... Things still looked up in the air with Mhadists broken through in the centre, even with their cavalry gone... but the loss inflicted by the Black Watch also meant that the main Mahdist 'brigade' was also at half strength and the Mahdist forces were broken!


So that's it! A great looking game, Dave's collection is impressive and the table looked fantastic. Great atmosphere all round and we made good progress. Afterwards, I got a quick game of Battlegroup with Stu, just giving him an example of play:


Lots of burning tanks (and an abandoned Tiger!). The Germans lost this quite heavily, but were out pointed! They would have lost a lot sooner had we been drawing morale chits.

Thanks to the guys for the games!