Showing posts with label Varnish. Show all posts

Monday, 19 May 2014

Basing

While working on finishing off the models I've been picking away at for the last few months(...), it occurred to me that I hadn't really detailed what I am doing for the basing of my mini's. Maybe I did a while ago, but I took a pic of what my rough process is.

So I start with my standard base - either a FoW one or one from Warbases. I try to keep units all on the same type of base - so for example all the half tracks I have done have Warbases large size bases.

I've mentioned a few times my reasoning behind basing everything. A lot of the FoW models come moulded on bases and I feel that if one thing has a base on it, everything should. It rattles some internal cage of mine seeing Universal Carriers that look out of scale next to Shermans... purely because the UC are on a base.

The base also provided a better transport solution (magnets) and stops the track to track car park look. The one that one of Battlefronts 'rangers' tells me never happens but that I see on battle reports all the time.

Here's the photo:


The 'Dark Earth' is a acrylic resin from Vallejo (26.218) and is basically a dark grey colour. I apply this to a base that has been well scored in a zigzag pattern by a craft knife. Usual (recently) I have just been using a teaspoon to scoop out the amount I need and then roughly flatten it down. The nice thing about the resin is that it can be cut and trimmer as required when it's dry.

Once it's dry and trimmed, I paint it all Vallejo Model Color Flat Earth (70983). If I am spraying matt varnish around this time I will also give it a spray of that just to seal it. A tip I picked up from Paul, Davey and YD was that if you are using wooden bases you should varnish all of them - including the under side. This means if water should ever get into your mini's, the bases don't swell up and become ruined. 

For bases with infantry, I just press the infantry down, then cut out a rough rectangle that they will fit in. Superglue on the hole and then press the mini in.

Then I paint the bases of the infantry flat earth and let that dry. Then cover the top of the base in PVA and using my home made squirty bottle of static grass (a washing up liquid bottle with the stopper removed) I fire the static grass onto the bases with little puffs of air.

For vehicle bases I just PVA and static grass, then superglue the model onto the base.

The last stage is some dabs of PVA and then application of scrub bushes and flowers (currently from MiniNatur). I'm not one for piles of stones or the likes, as my men are fighting in well cultivated Normandy. Similarly I don't like ruins, rubble, etc. Although to be fair it is a bit daft when my tanks sit on a road with their grass bases - but I'm not quite at the madness of interchangeable bases depending on the tabletop terrain.....

Monday, 3 June 2013

Problems with shiny decals

My second attempt at this blog, as my phones blogger app swallowed the first attempt!

If you've read back over my blog, you'll know I am a big fan of decals on my 15mm mini's. As much as painting and the various painting techniques have been something I've worked on during this project, I've also developed my technical modelling skills.

One issue I have had when using decals is one such technical issue. Some of my models have a 'shiny' area around the decal I have applied, and despite many coats of matt varnish it just will not go away.

Here's an example.


Having done a little research to try and find a cure for this, I came across the actual cause.

It seems that when applying a decal to a painted surface, the paint makes the surface of the model grainy on a microscopic level. When the decal is applied onto this, it creates microscopic air bubbles. These bubbles reflect light, causing something called 'silvering'.

It seems that the way to avoid this is to make sure you put a layer of varnish down before the decal. The varnish provides a microscopically smoother surface which prevents the air bubbles forming. There are also some decal solutions that I am going to pick up (Vallejo make some called Decal Fix and Decal Medium). The Decal Medium prevents air bubbles forming, but I think I will also be making sure I do no more highlighting after the matt varnish!

Saturday, 25 May 2013

Army Painter Quickshade on British 15mm models

Unusually for me this weekend I had my son on the Friday night, meaning tonight I found myself at a bit of a loose end. Yesterday I managed to get all my currently painted model to a point I was happy to move on to applying the Quickshade, so I bit the bullet with the weather being nice today and cracked on with that.

So here's my little tray, ready to go!


Quickshade (after initially using the Mid tone on my models, I was convinced to try the Dark tone) and stirring stick. Turps and a jar for pouring the turps into. Also included (but not in the photo) is my Quickshade brush, which is a beefy .25 inch. I use this for both applying and removing the Quickshade. And also my trusty rag, which I use for cleaning my brush and hands. In the event of a match ever landing near the rag, I may be in trouble.

So, some before shots.


As you can see, I've used this tray before! Also of note at this stage is I'm still working from the lollypop sticks for my infantry and I've not done anything with the bases on the Defrocked Priests.

Incidentally the pack of Defrocked Priests from Waugh Games has never turned up. The company have been very good via email, and it does seem to have just vanished into the postal system. I was down in Middlesborough at the start of the week and they were happy for me to drop in, however did not have the model in stock (the reason they knew it was posted was it had been the last one and needed re-ordered). So far they have been very friendly and helpful and are happy to send me a replacement when the item is back in stock. I'll give them another week or two before asking for a refund.

So, steps for using Quickshade. First of all, make sure it is shaken very well. Then shake it some more. Then open it and stir it thoroughly. For those interested, it looks like this...


So far I've painted a whole Infantry company, about 40 vehicles and 10 or so guns - and I've hardly made a dent, so well worth the money.

I've heard of a few people having issues with this stuff, but most of the time it seems to be that it's not mixed properly. The pigment and the varnish can separate when it's been sitting for a while, so mixing well is critical.

I use the brush on method rather than the 'dip' method, so I load up the brush and really lather it on.


Making sure the model gets a good coverage of the stuff. It's messy and your going to get sticky fingers. This is where you find out if the models put together stoutly. In this process I had one gun lose a trail leg, and one Defrocked Priest lose a .50 machine gun. These will be glued back on later.


The instructions are that you should leave the model well lathered for about a minute or so, then remove the excess. What i didn't do this time round was take into account the fact I was doing this outside in strong (for Scotland) sunshine and with photo's along the way. This meant I may have left the Quickshade on the vehicles and guns for a little longer than I should have - but this will be fixed with drybrushing later.I should really have been ready to take the excess of the 1st gun after i had finished the 4th, and same with the tanks.


Not perfect this time round, but every day's a school day!

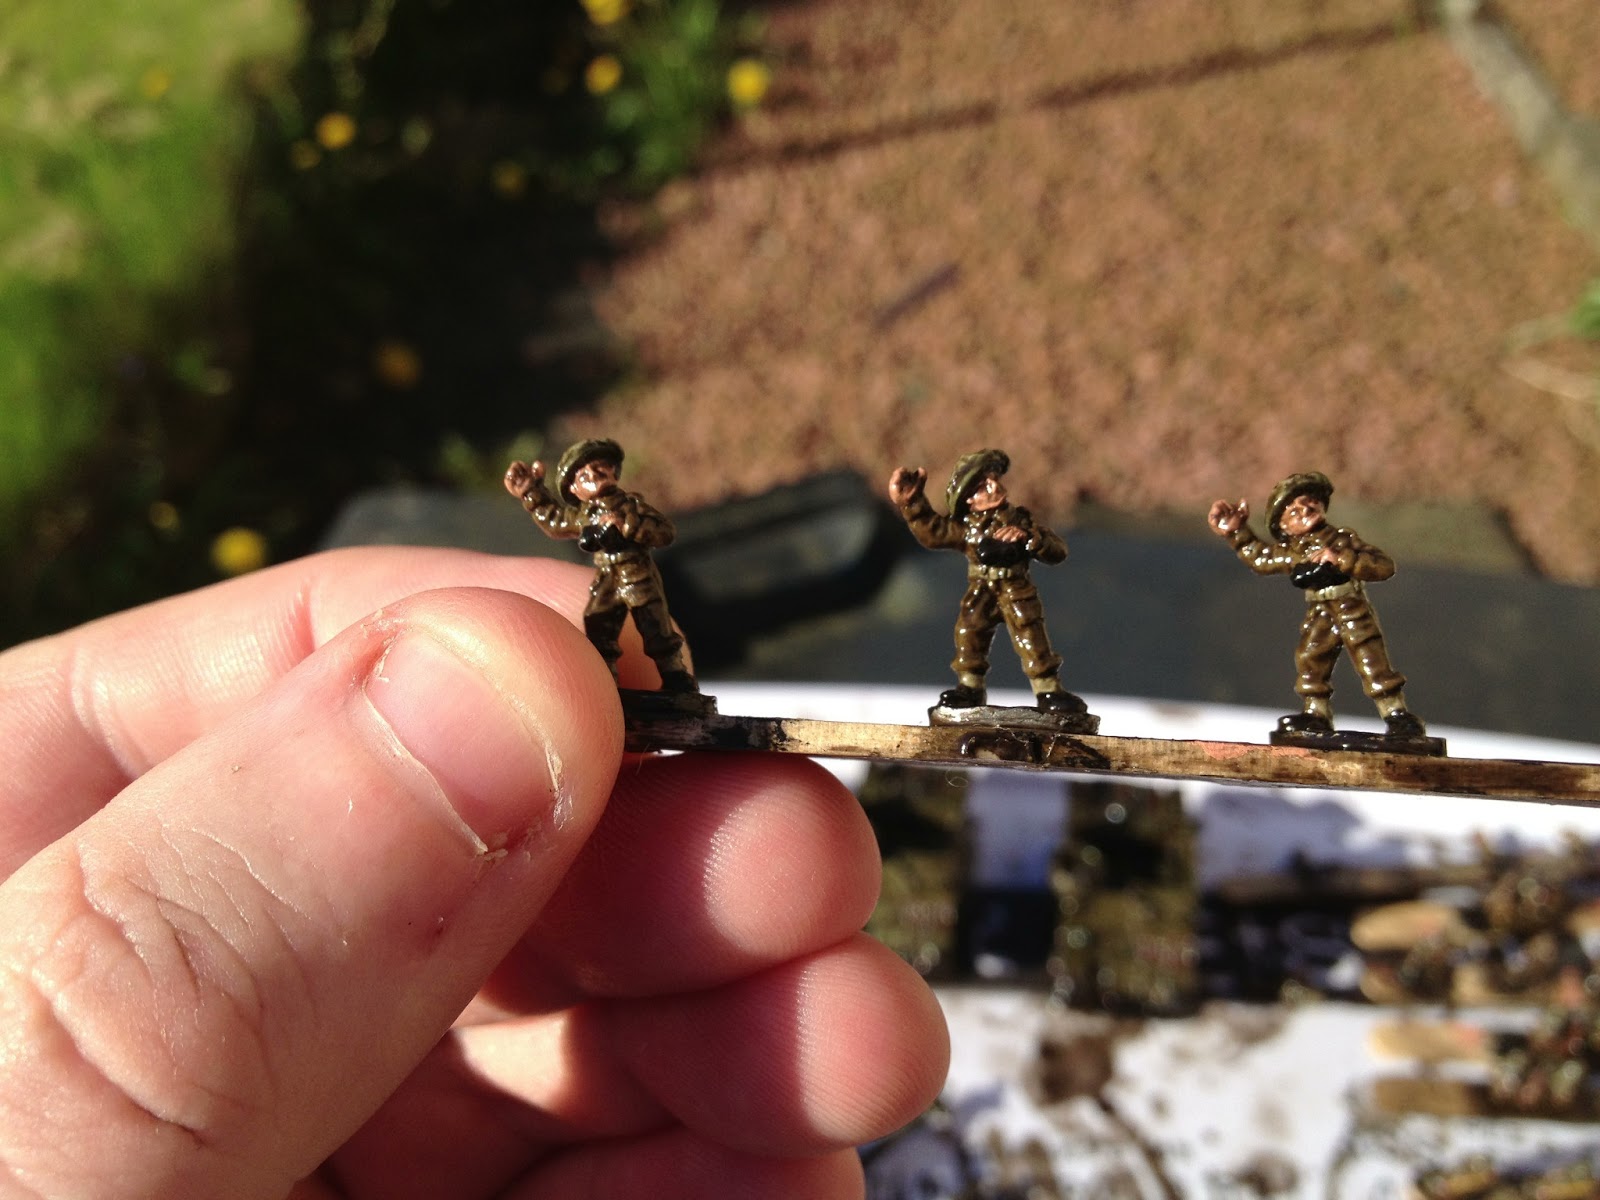
Next up the infantry. Same idea, really give the Quickshade a stir, then lather it on to really coat the whole model. Don't be shy!

Then after leaving it about a minute (with the infantry the time it took to do all the sticks was perfect timing to take the excess off) just clean the brush, rub it on the rag then use it to dab off the excess, cleaning on the rag as you go.

Before...

After


Next up for these models will be highlights (and drybrushing for the vehicles). Then a couple of coats of matt varnish to take the shine off.

Addendum: Using the Army Painter Quickshade and the lollypop sticks (as well as models with cast on bases) can see the models being stuck to the tray when the Quickshade dries. It's important that you keep the models apart, so as not to weld them together with the varnish. When it comes to taking the models from the tray, I use a fork to just gently pry the models from the tray. I'm sure modelling knives and the likes would work as well.