
I had intended this week to get on with some actual 15mm models but found myself at a loose end and making a start on my 15mm 4Ground Parish Church. For those of you not familiar with this model here's what it's supposed to look like:
 |
| Picture not mine - taken from the 4ground website and used without permission for reference purposes! |
One of the reasons it took me so long to decide to get this model is that it's not quite what I was looking for to suit my Normandy theme. The main issue had been the nature of the damage (far too clean looking, no rubble and the back end of the main building just missing) and the tower (both the massive hole in the tower and the fact it was not a steeple - which seems to be more common in Normandy).
Having done some work on the normal 4Ground ruined buildings, I thought I could remedy the 'clean' issue, and I had some ideas with what I could do with the tower. My original plan was to take the top off and have the remains of a steeple 'crashed' down on the ground.
So, I started building the model, and when I got to the tower I bravely (read - not so bravely) started hacking up this expensive birthday gift from my wife... This is what I ended up with. Ignore the (very) dirty paint water!

Along the way, the cunning plan had changed. I decided that making the fallen steeple would be a tad difficult, and that the nature of the hole in the tower would probably have meant the upper layers would have 'slid' down the building.
I assembled the tower as per the instructions using a small amount of PVA and blue tack. I then marked out the shapes I needed to cut. I then took the sections I needed to cut apart again. I used a fine tooth saw to cut the parts before gluing the whole thing together again.
At the base of the tower, I got my clippers, the remains of the sprues and a load of glue, and set to work.

Gradually the look I was aiming for took shape:

Until I eventually had the type of damage and rubble I was looking for:


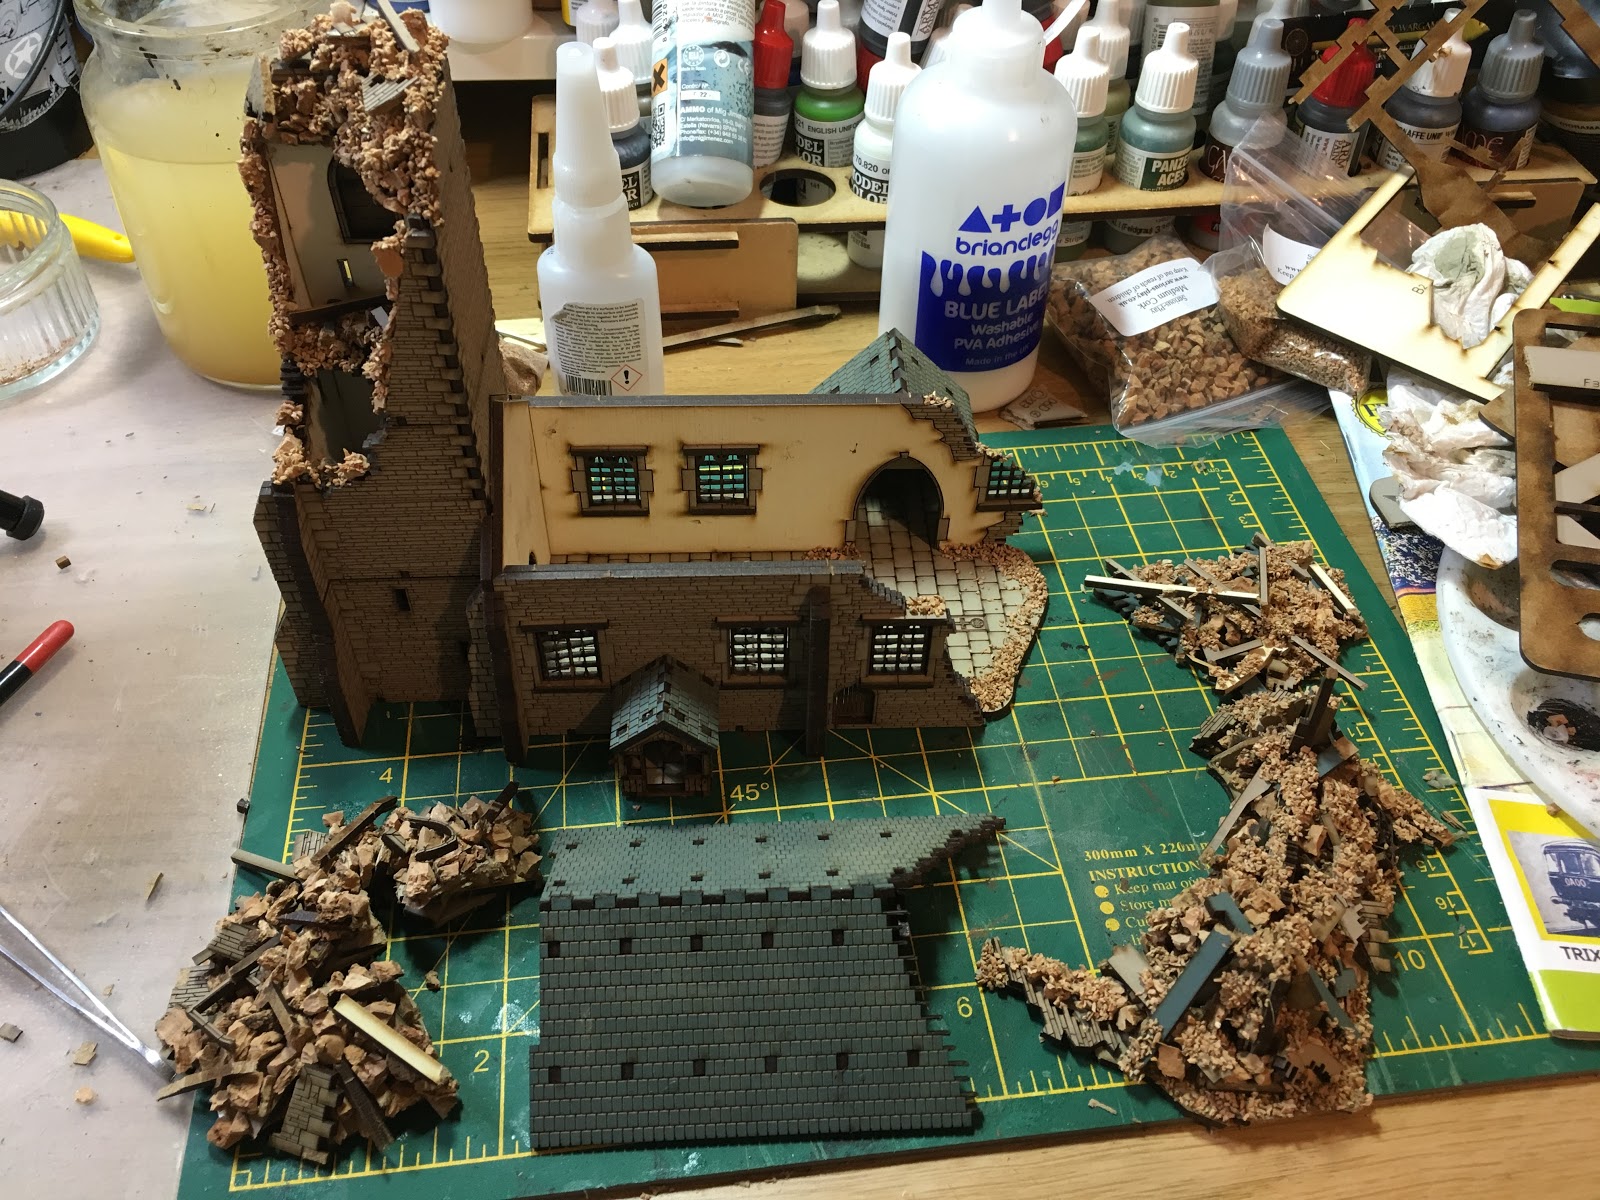
I've still a bit of work to do on this - I can seem some areas that will need painting and the likes - mainly to tie the colours together in the rubble and the rest of the building to my other buildings. But I'm pretty pleased. The tower could be a bit better, but I think at first glance it resembles a collapsed steeple. The rubble pile at the base of the tower could possibly do with being a bit bigger, but really it works as is. Once I get some paint on I'll see how I feel as to whether it needs expanding. As ever guys, your input is sought. I think when you spend a lot of time thinking and working on something you can lose a bit of perspective!
As you can see from the final picture above, the rubble piles are wherever possible removable - for transport and model deployment reasons. The damage to the tower is fixed in place, although the tower itself still splits down into multiple levels.


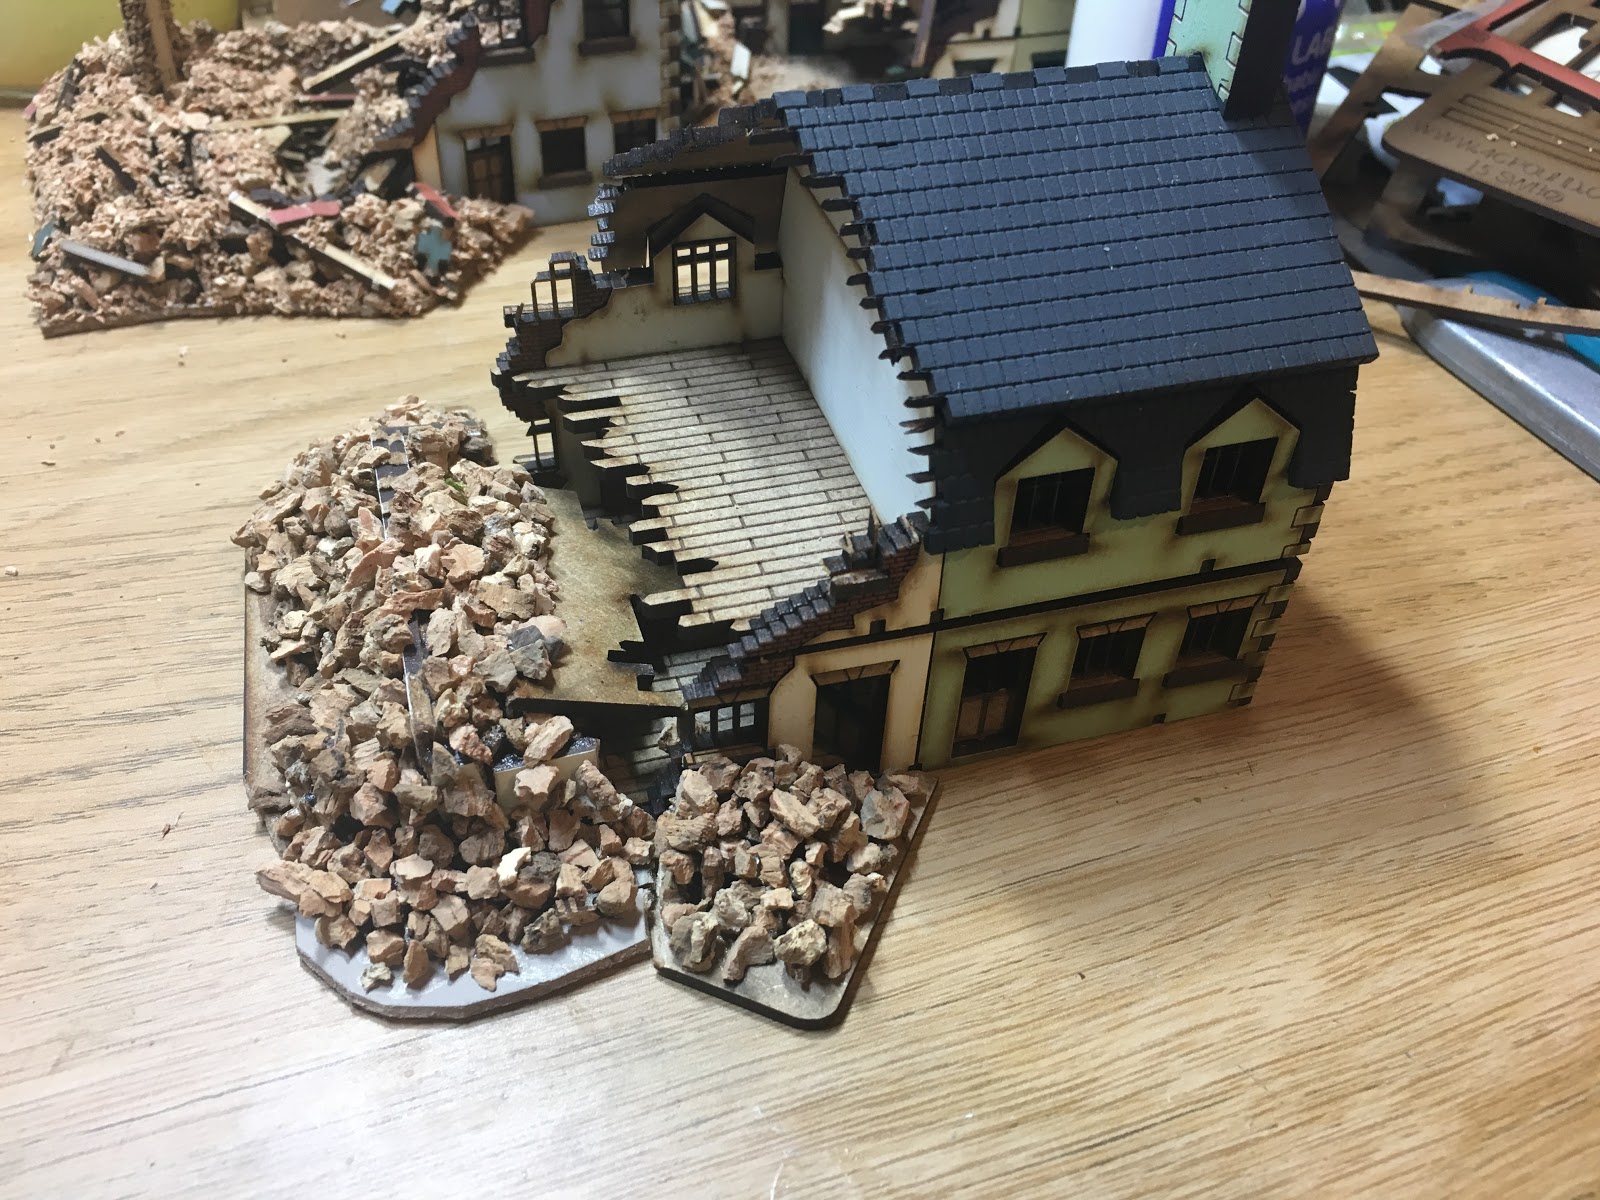
Having taken a whack at the church, I moved onto the other two ruined 4ground buildings I've had on the shelf since the last bit of work. I did take a few more pictures as I went with the first one, so hopefully this will be a useful insight into what I'm doing.

Starting with the built model, I use clipped off building sprue to make the base. In this case, I should probably have gone for multiple sections rather than one big one.
Things to watch for here:
1) that the thing your adding on (assuming you want it to be removable) is not glued to the model.
2) that you think about how your adding sections. In this case, this additional area actually has to 'slide' into place rather than being lifted up or down.
3) try to have a think about where the rubble would have fallen
4) do you need to 'replace' any missing sections of the building. In this case, a wall is missing which I've added back in.


Once the base is assembled, I use bits of sprue glued down with superglue to hold all the bits together. Just watch for warping, which I encountered slightly here.

Then, I start layering up the depth I want. Initially this is done with offcuts. I try to think how the rubble will sit. I also added some height to this one by adding a remaining corner.
For floor areas, I start by laying a piece of sprue down that fits the area. I then start layering up the beams and areas that will have rubble. You can see this a bit better below. If you plan on making this removable, just be careful with the glue. From time to time make sure that you can still take everything apart and that it all fits together again as well. Again, I'm thinking about the look of the whole thing, and how a 'naturally' ruined building would look.


Next up, I start adding more depth. I've been using cork chip for this. You can see the bags in some of the pictures. The bigger bits I use for the base layer. PVA works but is slow to dry. Superglue also works, but you need to be quick.
For a lot of this, I coated the area I wanted to cover in thick superglue then just poured over the cork 'rubble'. Leave it to dry, shake off the loose stuff and do it again till you have the depth you want.


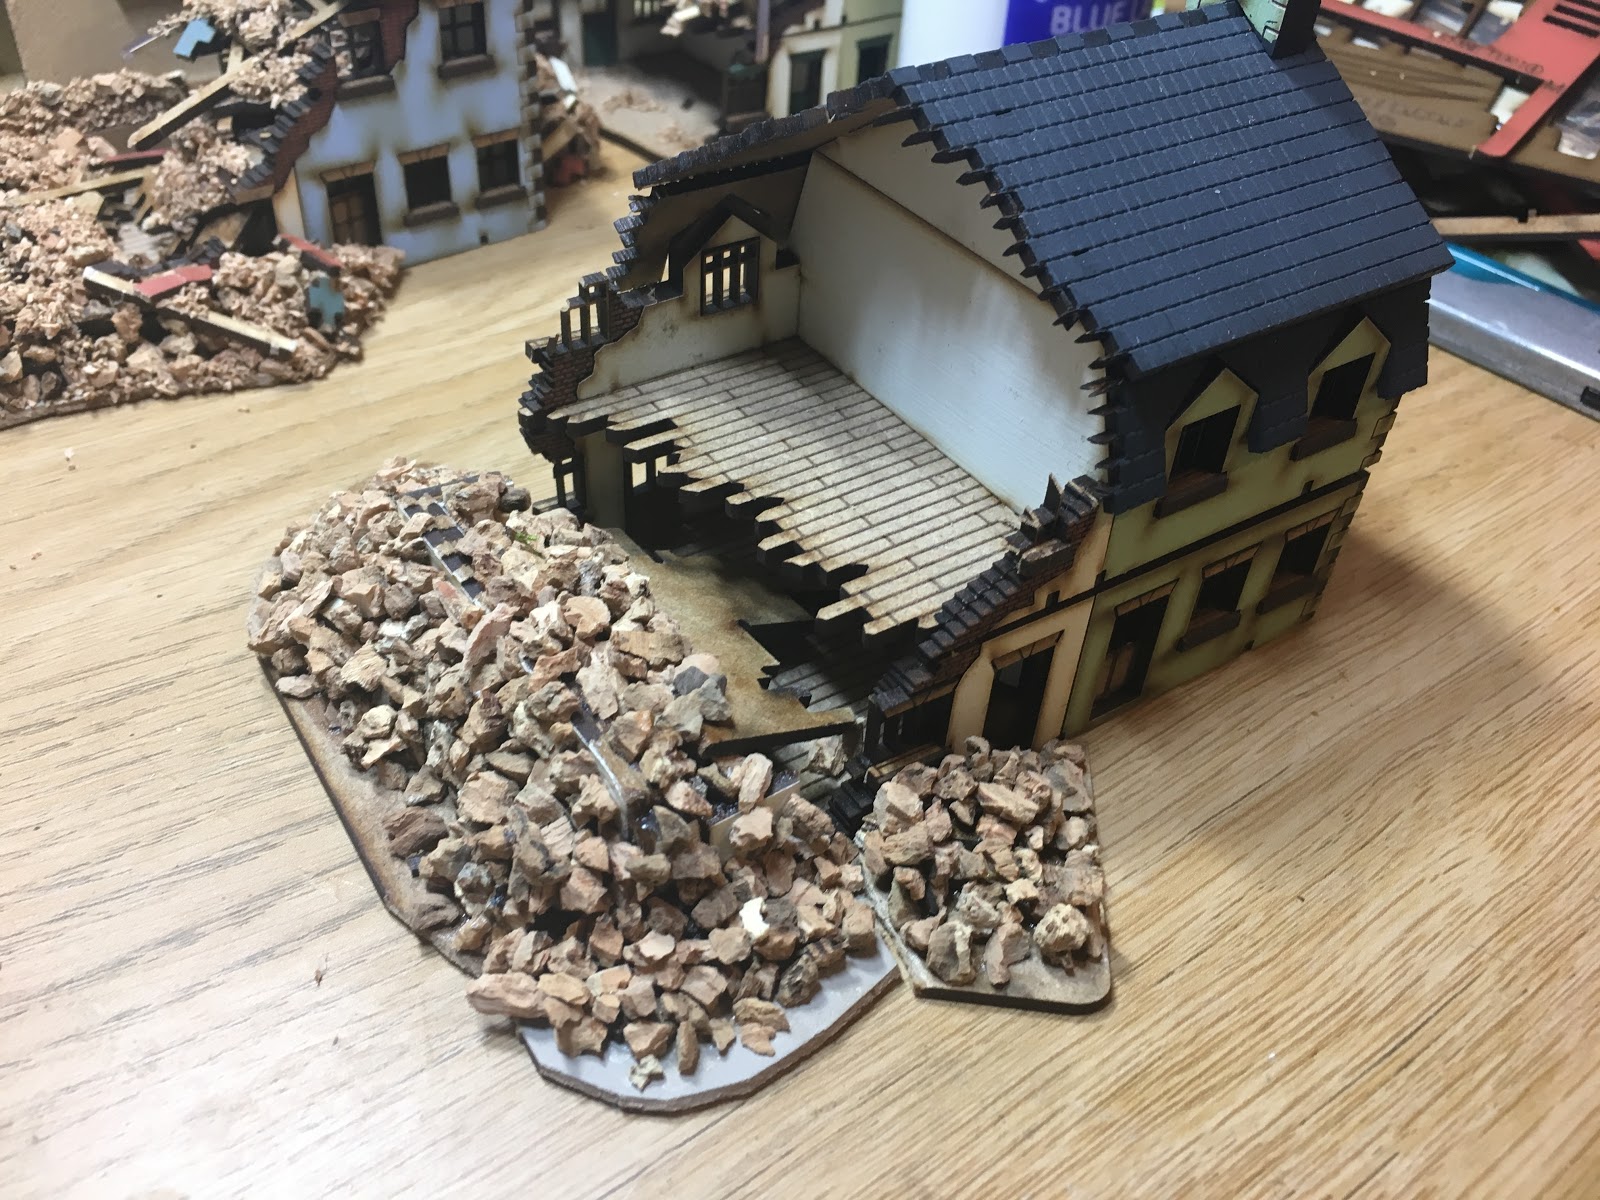
As you can see, all removable!

Once I've gotten the basic shape down, I add clipped up bits of sprue to lay on top of the rubble and look like beams, wall sections and bits of roof.
I then take the quite fine (brick like?) cork chips and apply using PVA as the base. I literally just dab PVA onto the areas I want to have the finer rubble and then shake the chips onto the model. This is normally done in a tub, so the chips can be reused if they don't stick.


This building needs a little more work - one of the things I did this morning was just build up the wall between the rubble piles a little so that it makes sense height wise. It also helped blend the colours in.


The last building is still a work in progress. I was a bit stuck with this one as the base model is one I have already 'ruined' so I had to do it differently. This time I built up the missing walls to use as a frame work, and just added a lot of rubble and a collapsed floor:


I'm not planning to build the rubble up any higher, just to detail it with beams and fine cork, and make sure lots of roof looks to have fallen onto the upper level and the rubble pile! Fingers crossed it works out.
So, I'm getting close to having this batch finished - I need to order more materials before starting the next lot. Those with be the buildings I purchased from Lee, which all need the same treatment for their damaged sections.
The sad cost of Liberation:


In an odd twist, I was drawn to the window on Friday night due to an altercation in my (otherwise very quiet) street. Some sort of road rage related incident was happening. While watching events, aero engines could be heard, and from behind the neighbours roof comes a Lancaster at pretty low level!
I had a proper split second of thinking 'that Hercules is Looooooh my god' before shouting 'it's a Bloody Lancaster!!!' (I may have disturbed the altercation by shouting 'It's a Bloody Lancaster!!!' as the living room windows were open)
I scrambled to get my phone camera up and managed to get some shots as the aircraft flew away:


My wife was suitably mortified... apparently people would know I was watching the argument and think I was taking pictures of them. I couldn't care less, I saw THE only current flying Lanc from my own window!
The pictures don't do justice as to how low it was - it seemed like only a couple of hundred feet. it was heading from our left to right, but towards us as well, if that makes sense. I think it had been taking part in the airshow at Sunderland.
A little while later, something small and fast with a single prop engine went over in the opposite direction, but high and at a distance so I couldn't tell the type. I'd like to think it was a Hurri or Spit!
Exciting times! (Oh, and Police arrived a short while later. I think it was an argument over right of way and some bashed wing mirrors, resulting in someones face getting bashed and someone else being arrested. The assaulted mans daughter ran out with no trousers on and had to be bodily carried back inside by her husband... But the Lanc was much more interesting!)


