Showing posts with label Wargame. Show all posts

Friday, 21 April 2017

FoW v4 AAR: The Battle for Noyers, Phase 1

Hi folks,

On Easter Monday I headed over to StiGs for a quick, introductory, game of version 4 Flames of War. Also taking part was Stu, who had never played FoW before. On the 30th of April I'm laying on a large scale FoW v4 game at the club, so wanted to use this game as an opportunity to test out the theory (and the new rules) in a trial scenario.

I decided to go for the Battle of Noyers (Operation Pomegranate), one of the diversionary attacks put in by the allied armies immediately before Operation Goodwood. As usual, I went with something that has a personal connection - this was the first battle that 33rd Armoured Brigade fought as a unit following it's arrival in Normandy. The other benefits of using this battle as a scenario is that there were two phases to the battle. This meant I could do a trial game with StiG and Stu before the main event, and have it impact on the game on the 30th.

As an intro game, and a scenario, I decided to use a few special rules. However, we stuck to the v4 rules for everything with the exception of three main points:

1.  Hidden German deployment. The Germans were controlled by myself as umpire and were deployed at the beginning of the game via a sketch map.

2.  Preparatory bombardment. The allied players each for a bombardment template at the start of the game, which left a ranged in marker. This was relevant as one of these templates was directly on a German position. Artillery was off table and available via a different mechanic..

3.  Tiddly Winks... Over the board, at points I deemed to be tactically significant (gaps in hedges, narrow points of the roads, forests and corn fields, etc) I scattered small green counters. These counters, on being approached by allied units, would generate a D20 roll on a random events table. These events ranged from positive events - such as 'covered approach' which allowed the unit to move 2d6 and be in cover at the end of that movement, or Ambulance Jeep, which brought on an ambulance jeep which would allow an auto unpin for a unit it was near. On the other hand, there were negatives - such as a random sniper shot against a unit (including armour - the commander was being sniped), German reinforcements or - mainly - minefields in Ambush! Artillery was also available (for both sides) through this method, but neither side rolled for artillery support.

This combination of hidden deployment and random events seemed to go down very well with the players. StiG stated that he thought it was one of the best games of FoW he had played, which I take as a massive compliment. Both players approached the game carefully and tactically and there were some great, thematic, random events. Like both times the corn fields were entered resulted in the 'covered approach' roll, allowing units to appear at the edge of the corn in one move. Or the unit emerging from the corn into an orchard rolling the 'lost' event, and ending up 2d6 away in a random direction and emerging onto the parallel road. The most common event, however, was 'minefield'. This was deliberate, as I had seeded this event into the table several times to reflect the history of the battle. Basically the allied forces had been promised that friendly minefields had been lifted or gapped for them, only to find out they had not been. As a result, from one Squadron of 18 tanks, only 7 made it to the enemy positions - largely down to 'friendly' minefields!

I'll be using a different table to roll on during the next game, so for your enjoyment, here is what I used:

Battlefield Events 

  1. Ambush minefield – skill test to avoid (4+)  
  1. Wireless failure – no unpinning or remounting for one unit this turn – umpires selection 
  1. Reinforcements – Sherman Crabs (if already on table, roll again) 
  1. Artillery support available (off table) - 1 battery of 4 x 25 Pounders. Must be used in same turn, if no spotter then previous ranged in marker used. May lay smoke.  
  1. German DF point – mortar bombardment on location of counter 
  1. Ambush Minefield – skill test to avoid (4+) 
  1. Battlefield smoke – unit counts as concealed for turn 
  1. Field ambulance available (can be held till needed, immediately unpins one platoon) 
  1. German Armour – StuG reinforcements arrive 
  1. Covered approach – unit may move 2d6 in a chosen direction, counts as in cover at end of movement.  
  1. Commander casualty – closest armored vehicle immediately bailed 
  1. Ambush minefield – skill test to avoid 
  1. Reinforcements – Crocodiles (if already on table, roll again)  
  1. Enemy spotted – hidden enemy unit visible for turn.  
  1. Artillery support available (off table) - 1 battery of 4 x 25 Pounders. Must be used in same turn, if no spotter then previous ranged in marker used. May lay smoke.  
  1. Sniper – enemy sniper shot against unit. 
  1. Battlefield smoke – unit counts as concealed for turn 
  1. Ambush minefield – skill test to avoid (4+) 
  1. Lost – unit randomly moved 2d6 in random direction 
  1. Covered approach – unit may move 2d6 in a chosen direction, counts as in cover at end of movement. 


Brits deploying and the long view up the table. Objectives there the three 'lines' up from the nearest cornfield. With line 1 being the hedgerow, line 2 the orchard and line 3 at the rear of the hamlet. 

Somewhere, Germans lurk...

Allied forces start rolling forward, with the friendly minefields to their front, and the 'cleared' spaces. Note the tiddly wink next to the hedge. 

Rapidly, the allied advance ran into minefields. Quite a lot of minefields, especially in front of StiGs platoon of the 1/6th South Staffs.

Ranged in markers and craters marking where the initial bombardment landed. 

StiGs infantry (on the right) had to clear several minefields to let his tanks advance. Minefield rules have now been well and truly clarified for next game!

Shermans breaching the hedgeline. I wonder what that tiddly wink could be... a Minefield!
As the allies advanced, the Germans held their fire, waiting for clear lines of fire (or trying to unpin)!

Stu's careful armour advance, avoiding the road... The marker on the road would turn out to be... a minefield!

StiG running into more minefields! but they were still enjoying rolling the D20. 


The first Pak40, having unpinned, takes some shots and some of Stu's infantry on the road (the only target it could see). Both teams died, but the German forward line was established. Or was it!

The German Pak40, despite being dug in and having a 3+ save, it fell to 75mm fire from the Shermans. 

Stu encounters another hidden gun, losing a Firefly in the following turn. StiGs forces circumvent the minefields and try to keep up!

The Firefly commander scans the ridge carefully... he thought he saw movement, but it must have been a rabbit.
Stu's platoon reaches the edge of the corn field, to find themselves face to face with a dug in German infantry platoon. Concentrated MG42 fire would soon wipe out this half of the platoon (another slight variation from the rules, Stu had the company commander with the rest of the platoon, so we judged that it would stick around under his command till the platoon commander got back in command range). 

The StuGs make their presence known... for the allies some Crocodiles and Sherman Crabs turned up. 

The Crabs chose to operate out of command - a dodgy move if they had taken casualties, but it fitted the scenario. 
A German Sniper team in the corn, soon to be pinned and assaulted - no prisoners were taken! The Sherman on the road would fall to a Pak40 shot from the hedgerow beyond the corn field. 

Ambulance jeep, prior to being run off the road by HMG42 fire from the green building. 

Burning firefly (using my new smoke marker)
The battle rages. Stu's surviving infantry flank the village while his armour moves up. StiGs armour and infantry get bogged down in the corn field, losing a Sherman to the Pak40. The infantry platoon would get hit hard by MG42 fire. 

British armour dashes up the road to support - including the Crocodile, which would burn a lot of the Germans from their buildings. A duel was ongoing on the left between Stu's armour and the left most Pak40. The Pak would eventually lose. 

A StuG and Pak40 trade long range fire with StiG's crocodile. But that front armour of 13 bounces it all. 

Close up of the StuG on Sherman action...

Allied armour enters the town. A German assault from the buildings is seen off with no casualties on either side. Then the Croc gets in range and 5D6 dice worth of flamethrower (causing re-rolls on successful saves) empties the buildings of German units. On the other flank, the other Croc does the same. The last surviving German squad surrenders, and Phase II is read to go!


I really enjoyed running the game, and I hope I can run something as fun on the 30th! The table looked great, and it was really good to get my terrain out again. Need more hedges and stuff, but I was happy with the look.

How did v4 play? I think StiG summed it up best. He has played v1, 2, 3 and now v4. His comment was that "It's Flames of War, it just plays more smoothly. But it's definitely Flames of War.". I would 100% agree - this was very much a FoW game, even with my little tweaks. I'm a strong believer that the rules can be used as a framework for playing historical games. I think what we played was a fun, fast and tactical game based very much on a historical scenario. To me, it reflected the outcome of the actual battle - and that is key to me. Any rules should reflect the outcome you expect.

I'll get pictures and stuff from the game on the 30th,

Thursday, 16 June 2016

3mm Team Yankee - 1st attempt

Hi folks,

As mentioned previously, I've been working on using my 3mm platoon based models with a version of Battlefronts Team Yankee rules.

Today I managed to get my first outing with these, as Steve and me played a couple of trial games using some of the recently 'finished' units. I say 'finished' as there are still some little bits to complete on these.

The first game we played was a re-fight of the 'Death of Tank 66' battle from the rule book. This small scenario normally has 3 T-72's face off against a single M1 Abrams. However we tried 3 bases of T-72's (representing a company of Tanks) versus a single base of (a platoon of 4) M1's.

The result was a fairly quick US victory, although the T-72's did manage to bail the US platoon.

We then decided to try a slightly bigger game. I laid out Team Yankee (as per the org chart in the book):

Blank bases currently for the infantry - until a decision is made on how to base them

1 M1 HQ base (with 2 M1's on a medium base)
2 M1 Platoons (with 4 M1's on 2 large bases)
1 ITV Platoon (with 2 ITV's on a medium base)
1 Mech Inf Platoon (with 4 M113's on one large base, 1 infantry platoon on a medium base and one Dragon section on a small base)

I also put together a Russian force, consisting of:

1 Battalion command (2 BMP1's on a medium base)
1 T-72 Company (3 large bases of 3 T-72's each - one base will later be upgraded to have 4 tanks).
1 BMP1 Motor Rifle Company (4 large bases of 3 BMP1's. Infantry wise I used 4 large bases to represent the bulk of the infantry. 4 medium bases to represent the RPG teams and a medium base for the MG team. this didn't really work, so we swapped out mid game for medium and small bases. However we revised this again - more later)
1 BMP2 Motor Rifle Company (same as BMP company above)
1 Recce platoon (3 BMP2's on a large base).

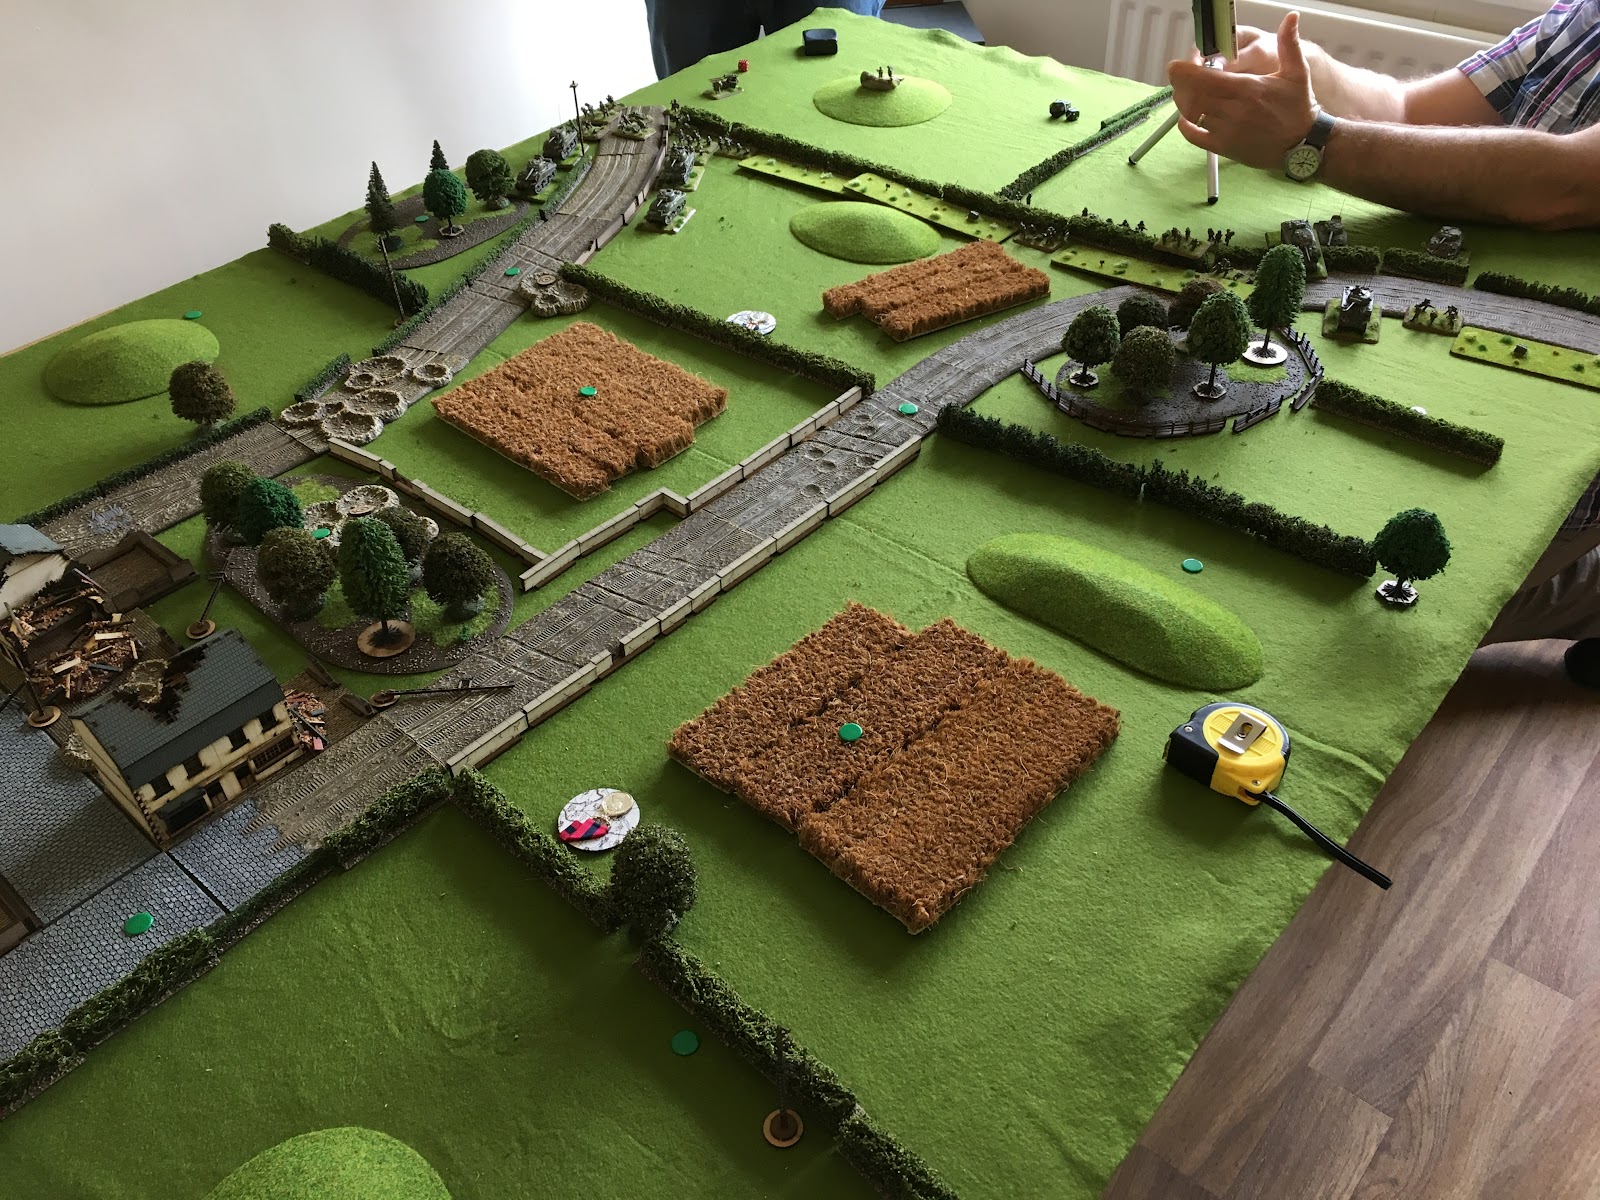
Immediate changes to the rules were to use the inches measurements but convert these straight to cm. We looked at the inch and normal centimetre measures on the table, but they were just too massive. Using the inch ranges and changing this straight into centimetres seemed to work fine.  The table was a 3 foot by 5 foot set up by Steve.

US on the left, Russkies on the right. From bottom to top Steve's deployment was: The Mech Inf platoon in M113's, the 1st M1 Platoon, the ITV's in the wood, the Company Command M1 team and the 2nd Platoon on M1's.

Mines, from bottom to top, was: BMP2 Recce platoon, BMP2 platoon, BMP1 platoon followed by Bat. Command and then at the top the T-72 platoon.


The battle was a bloody affair, with the T-72's dying pretty quickly to fire from a platoon of M1's and the company command stand of M1's.

For units of 4 tanks like the M1's we treated them like a single standard M1 but with a re-roll to hit (due to the number of tanks firing 2 shots each in the unit). The unit itself had 2 hits, with the loss of a hit taking it to half strength and losing the re-roll. We used the same system for bailed out results on the unit. The 'command stand' of 2 M1's had a single hit point and fired as per a normal M1.

The T-72's we gave 1 hit point to each base. However I think we will revise this in future to having 2 hit points, but no re-roll as there are less than 4 vehicles on the standard stand (later the HQ base will have 4 tanks, so will have two hit points and re-rolls to hit). This should make them a little more survivable.

The key to how the size of the unit effects the impact on the table is mainly to do with points efficiency. If all units were the same, then it would be better to take 4 units of 2 tanks than 2 units of 4 tanks.

In the centre the ITV's had no vehicles to shoot at the whole game. They used the special move order to get up to the treeline without having counted as moving. For the US platoons each base could use these orders individually, for the Russkies only those near the command base could try this - meaning they either stuck together or spread out and lost some of that tactical ability. The Russkies move in the centre was to unload their infantry who began a slow walk across the table towards the ITV's.


This combined with the infantry foot advance on the southern flank revealed that infantry were not going to work in their current format. the US vehicles just could not kill them fast enough, and would be over-run. Using 1 platoon as 1 tank means each base had either 2 main gun shots or 3 (I think this might have actually been 5) MG shots. With a 3+ save and 3 hit points per stand, the infantry would just keep coming. The ITV's couldn't shoot them and I had wiped out the US Mech Inf platoon and M113's.

M1's observe the carnage - and the Russian Infantry hordes (blank bases) creeping towards them!


So, in light of this we halted the game, and talked about what to do with infantry.

The first step was lower the footprint. We dropped the large bases to mediums and the mediums to small - this made a big difference visually at least.

We then talked about the number of bases in a unit. In Team Yankee a full strength Motor Rifle platoon is 12 BMP's and 21 infantry teams (22 if you include the AA platoon). Rationalising this down, next time we will try:

4 x medium bases with 3 hit points each, and 1 small base with 2 hit points (an 'HQ base' with the LMG and AA team weapon options). I will also mark one of the BMP team bases as the 'command base'.

In addition, each team would be able to fire 2 weapons from their stat line a turn. Each unit would re-roll misses in defensive fire if assaulted. If pinned then 1 weapon system could be used and no re-roll on defensive fire. Pinning would be via 5 hits in a turn to the unit, via a single artillery hit, etc.

A US Mech inf platoon would be one medium stand with 4 hits. 

This keeps them resilient but doesn't clutter up the table or storage while allowing them the same weapons options. The unit would also have 14 'hit points' which is better scaled with the incoming fire they might receive. Another option would be to force them to re-roll saves if under MG fire from big platoons - like the 4 M1's.  Funnily I've gone from being worried about the fragility of the infantry to being concerned about the power of them!

Other options currently are to look at another rule set! But in looks, at this stage, like Team Yankee will work. Fast, simple and pretty quick to pick up. Once the infantry issue is resolve it should work fine!

We'll also need to try artillery and aircraft in the game, which we will introduce once the basics are down and working.

Sunday, 29 March 2015

Full Thurst: Needle in a Nebula


Transmission: NAC CMD SEC G-5 TO CPT JAMES (OC RNS  BLORE HEATH)
Classification: Black-Charlie

Decode-Cypher: X-Gamma-Laura
Trimming Automation Directives Executing…

Parsing Information.
 Anomaly Detected… Trimming Anomaly from Transmission
Stored {1564-FlushDrive-2376-3-5}

Transmission Reads:

Captain, Congratulations on your success in the previous engagement.

In reading your latest FTL Buoy, we have assigned an urgent response mission. FTL Analysts have uncovered an anomaly within the enemy ship’s escape readings. There is a 75% probability based on previous readings that the stealth vessel, hereby referred to as [UGC-Black Herring] will suffer catastrophic Cherenkov shift some 26.7354 Light years hence. This damage to FTL systems is predicted within the enclosed coordinates, within the Davidson-FJ Nebula.


The chance to capture the Black Herring still exists, if we act with haste. Gather your remaining fleet and rendezvous with HRS Cambuslang & Entourage to sweep the Nebula. (An externally mounted Sensor suite has been temporarily installed upon the Cambuslang to aid in this)

Your orders are: 

-Destroy as many UG Corp vessels as possible: the presence of such a PMC Force in Sector G is disruptive to long term developmental goals. 
-Find and Acquire UGC-Vessel Designation “Black Herring”.


[END]

Additional: Data cryptologist Gavin Hurst has looked at the strange inclusion within the transmission, he reckons it’s based on an old cypher that takes advantage of physical mediums in order to confuse electronic systems. He knows this because it’s commonly used within certain University environments, and he based his thesis upon it. He requests leave from deck-duty in order to work on decrypting the message. Do you allow it?

Saturday, 31 January 2015

AAR: 51st HD vs Hermann Göring Fallschirmpanzerdivision - Part 1

I had the chance to get along to the Carluke and Law Wargames club on Saturday for the first time in a few months. I've been slowly chipping away painting wise (slow progress is still progress!) but feel I sometimes need to play some games to get me actually going. We agreed on 1750pts.

One issue I had was building an army that included unpainted mini's (to spur me on to paint them) - mainly because I've very few things that are assembled and unpainted. I didn't feel I had the time to properly prepare and assemble anything else. As such, I decided to use stand in's - with YD's permission.


I used two Churchill AVsRE to represent two Churchill Crocodiles and 4 x 25-pdrs to represent some 4.2" Mortars. I also cracked open the Forged in Battle Loyds Carriers that are next in the painting queue and a blister pack of Wasp Universal Carriers. 

My army list ended up looking like this:

PlatoonQtyUnitPoints
Headquarters
Rifle Company HQ (51st) p.143
1
1
1
Cmd Rifle team
Cmd Rifle Bagpiper team
Troop Carrier
40
Combat Platoons
Rifle Platoon (51st) p.144
1
1
1
6
2
Cmd Rifle/MG team
PIAT team
Light Mortar team
Rifle/MG team
Defrocked Priest APC
160
Rifle Platoon (51st) p.144
1
1
1
6
2
Cmd Rifle/MG team
PIAT team
Light Mortar team
Rifle/MG team
Defrocked Priest APC
160
Rifle Platoon (51st) p.144
1
1
1
6
2
Cmd Rifle/MG team
PIAT team
Light Mortar team
Rifle/MG team
Defrocked Priest APC
160
Warrior
Captain John Treleaven (51st) Fearless  Veteran   p.58
1Captain John Treleaven80
Weapons Platoons
Carrier Platoon (51st) p.145
3Wasp Carrier105
Pioneer Platoon (51st) p.146
1
1
3
2
Cmd Pioneer Rifle team
15 cwt truck
Pioneer Rifle team
Jeep with trailer
80
Mortar Platoon (51st) p.147
1
1
3
6
6
Cmd Rifle team
Troop Carrier
Observer Rifle team
ML 3" Mk II Mortar
Mortar Carrier
160
Brigade Support
Machine-gun Platoon (51st) p.149
1
1
4
4
Cmd Rifle team
Troop Carrier
Vickers HMG
MMG Carrier
155
Heavy Mortar Platoon (51st) p.149
1
1
2
4
4
Cmd Rifle team
Observer Rifle team
Troop Carrier
ML 4.2" Mortar
Loyd Carrier
140
Support Platoons
Crocodile Tank Platoon Confident  Trained   p.157
2Churchill Crocodile265
Infantry Anti-tank Platoon, Royal Artillery (51st) p.154
1
1
4
4
Cmd Rifle team
Troop Carrier
OQF 17 pdr gun
M5 half-track
230

A very flamey list! I really did try to go for an assault list to try and get out of my usual play style. I figured the inclusion of Captain John Treleaven would let me have a platoon that passed motivation on a 3+ - a useful inclusion for my Reluctant Vet Jocks.

The three infantry platoons would give me staying power. The mortars to provide smoke and pinning. Pioneers for extra assault oomph (and another flamethrower!!!). Machine guns because I like the dinky little MG carriers (and their pinning bombardment ability) and 17-pdrs because the only other anti tank capability on the list consisted of some PIAT's and the 75mm guns on the Crocodiles. I included the half-tracks and transports for all the platoons as I didn't know what mission we would be playing. And the mobility element has been part of the Operation Totalize theme for my Jocks from the beginning.

Young David went for a list from Fortress Italy:


From memory this included 2 artillery guns (105's?) + spotter and command, 2 PaK 40's, 4 Panzer IV's (2 long and 2 short barreled). a Tiger, two SPG half tracks, three Infantry platoons and a 2 gun MG42 platoon. Half-tracks for the HQ platoon and for one of the infantry platoons were also included but not in the pictures.  


Apologies for the picture quality - they don't don YD's figures justice! I was taking the pics on my Ipad for the first time and from a funny angle - resulting in them being upside down and with my shadow on them.

We set up a quick table and rolled for a mission. We ended up with Fighting Withdrawal, and as I had the Crocodiles in my list I was on 'Always Attacks' and YD was defending.

YD set up first and elected not to have anything in ambush. I deployed second - feeling a little cramped and aware that the dreaded FoW parking lot game table was becoming apparent.

My plan was to aim for the objective on my right, using the hill and other cover to close before flaming my troops in. Using the mortars for pinning and smoke are required. On the left I would keep the pressure on with an infantry platoon and the MG platoon, hold the center with an infantry platoon that could also go right should I need them... and generally use the 17-pdrs to screen as much of my force as possible while dealing with the dreaded big cat!


And the plan (sorry, it's just using MS paint and isn't very clear):


But as part 2 will reveal... no plan survives first contact with the enemy!